
The developer community loves shadcn. Its design and utility are unmatched. But what if your stack runs on plain JavaScript? Most guides assume TypeScript, forcing you to choose between type safety and speed. This is boilerplate we can skip. Stop wasting time on type stripping or framework migration. This guide gives you the definitive architecture and setup to integrate shadcn/ui seamlessly into any pure JavaScript React project.
TL;DR
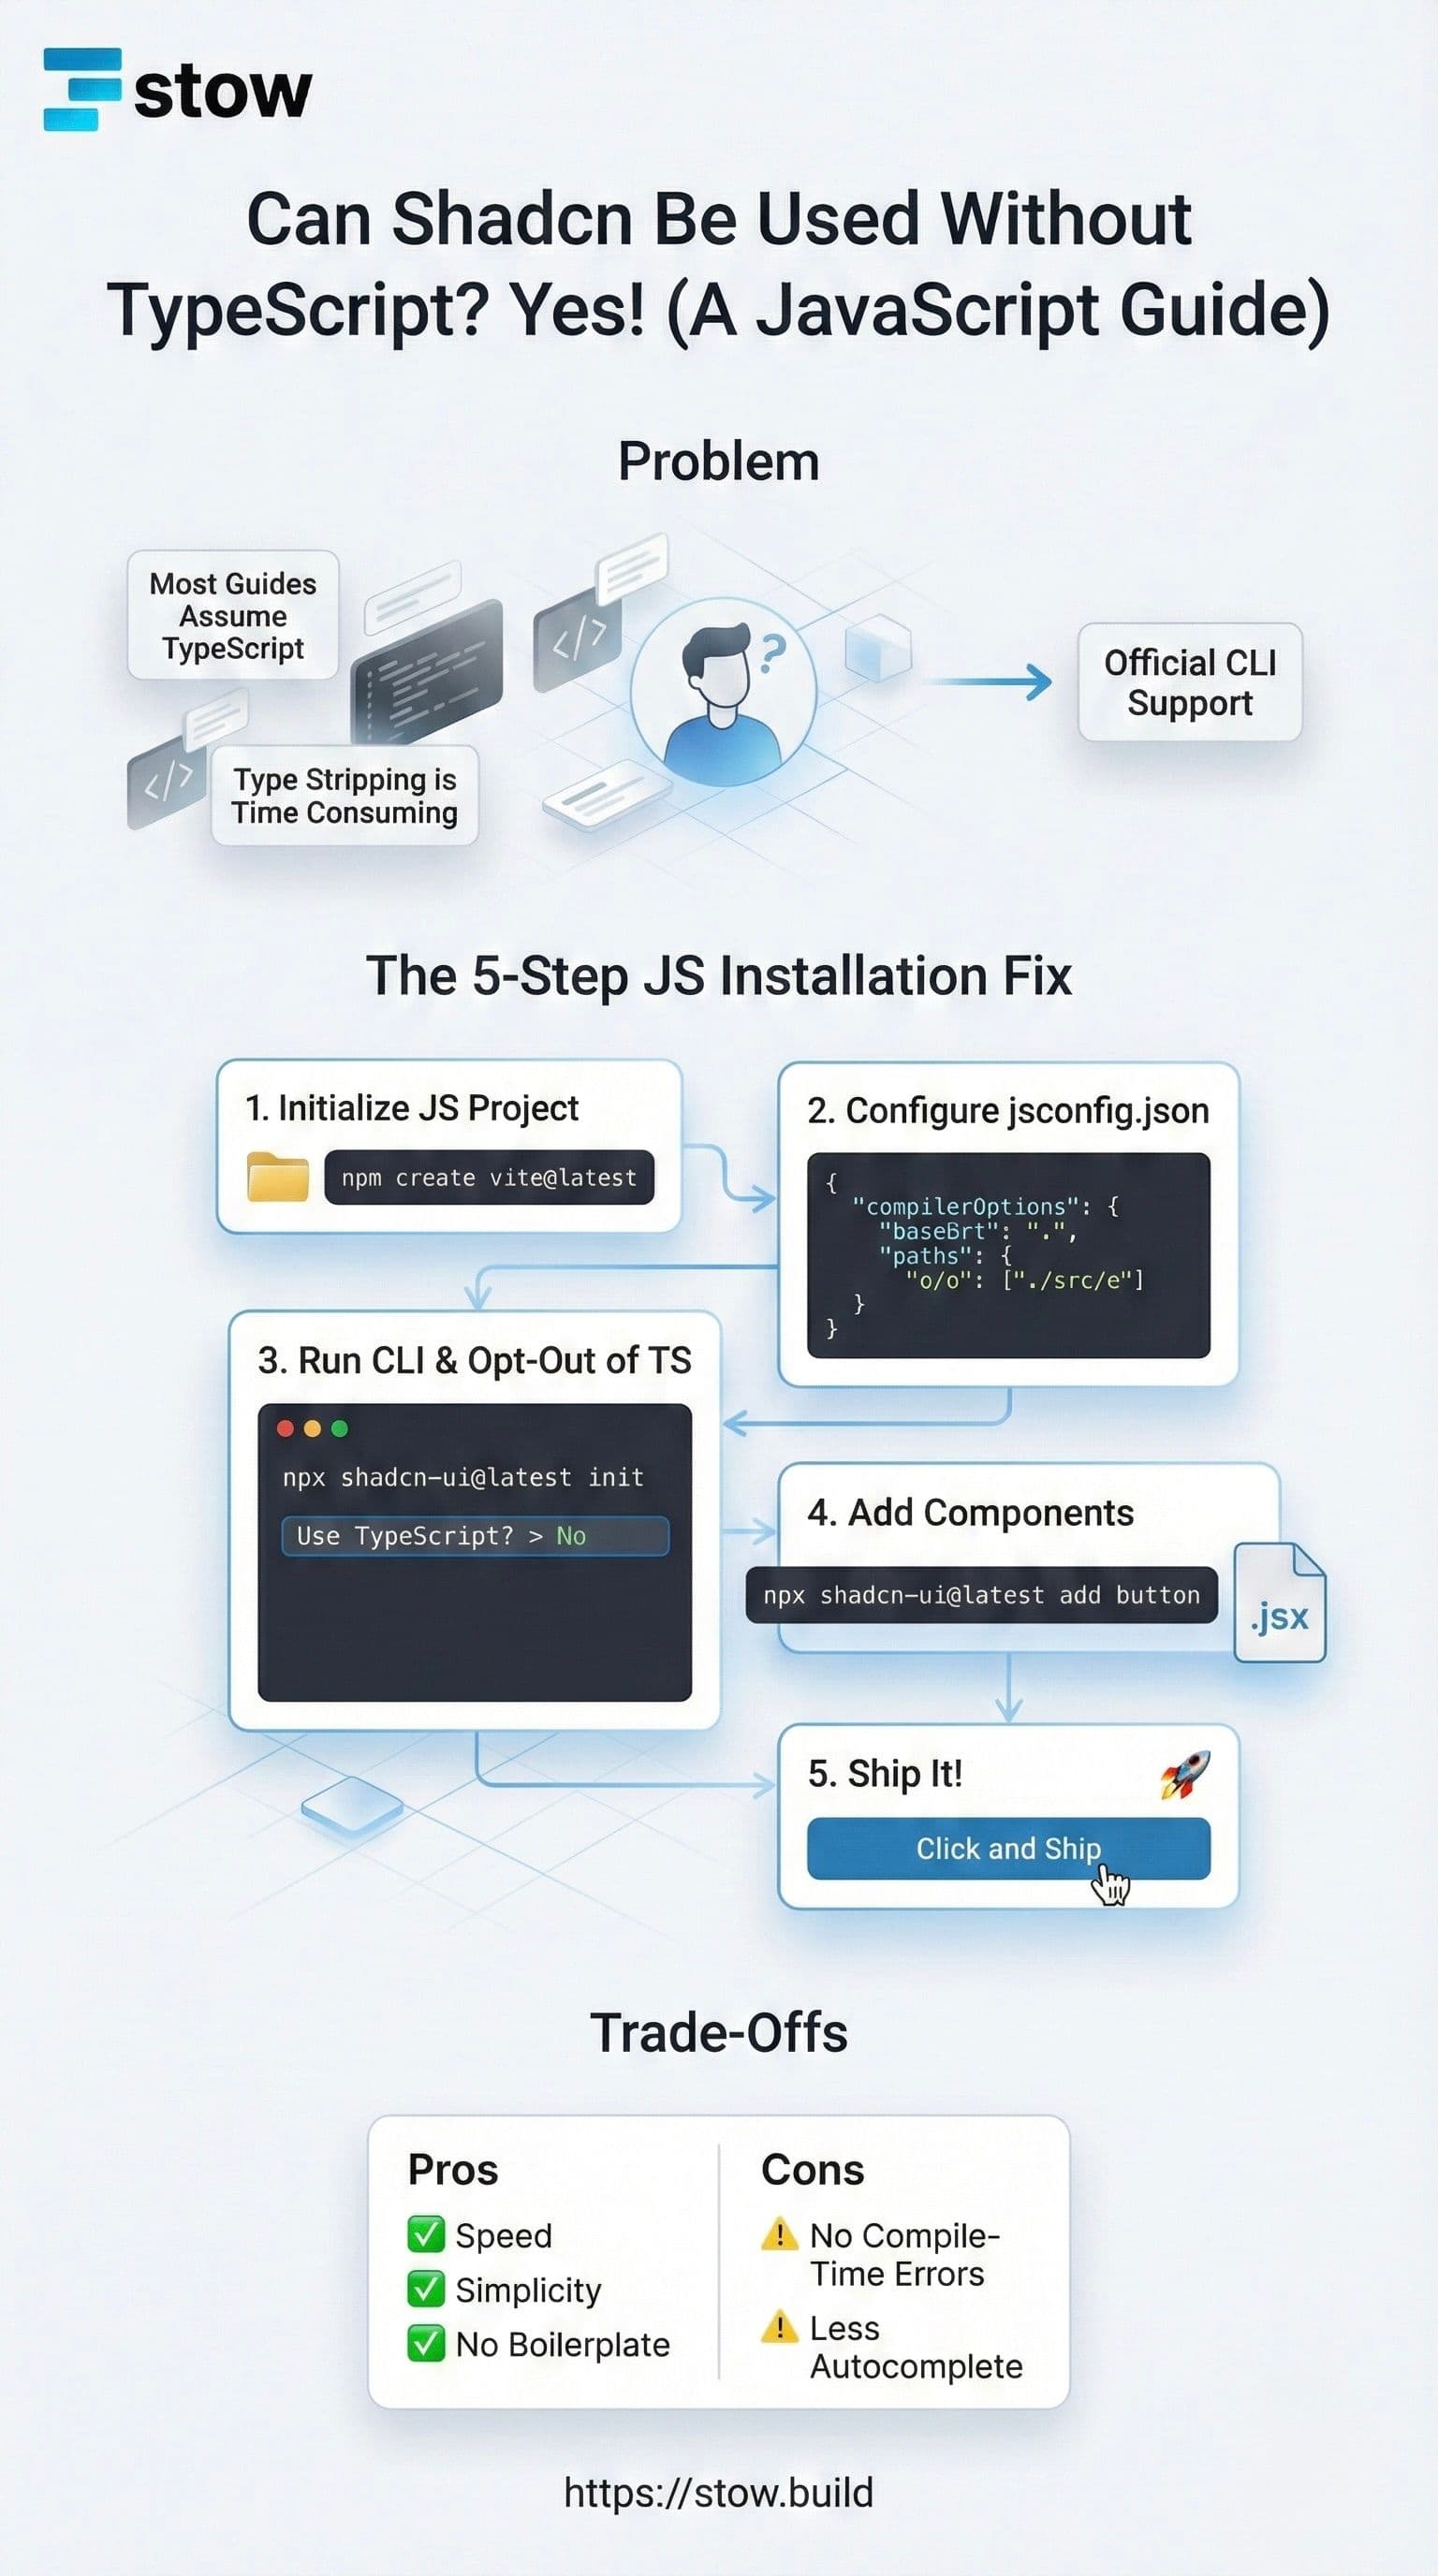
- Yes, absolutely.
shadcn/uifully supports JavaScript-only projects. - Use the CLI: The installation process includes a specific flag to generate
.jsxfiles. - No Manual Stripping: You do not need to manually remove TypeScript types from component code.
- Requires
jsconfig.json: Set up a simple configuration file to handle path aliases like@/components.
1. The Definitive Answer: JS is Go
The most important thing you need to know: You can use shadcn/ui without TypeScript. The library's core components are written in TSX, but the official CLI provides a robust, battle-tested opt-out that serves you pure JSX.
This isn't a hack. This is an official feature. Your project—be it Vite, CRA, or Remix in JS-mode—is fully compatible. Ship high-quality components faster, regardless of your type system.
2. The Friction Point: Why Developers Ask
When you run npx shadcn-ui@latest init, the CLI defaults to a TypeScript setup, generating .tsx files. This is the source of the confusion. Many developers manually download the components and then face the tedious task of removing all the type annotations (: React.FC, : string, etc.).
Don't do this. The official command-line tool handles this conversion for you, saving you minutes of repetitive work on every component. We're here to build, not boilerplate.
3. The 5-Step JS Installation Fix
Integrating shadcn/ui into a pure JavaScript React environment requires a simple, one-time configuration.
Step 1: Initialize Your JS Project
Start with your standard JS React stack.
Example: Create a Vite + React JS project.
npm create vite@latest my-app -- --template react
cd my-app && npm install
Step 2: Configure Path Aliases with jsconfig.json
shadcn/ui components rely on path aliases (like @/components). In TypeScript, this is handled by tsconfig.json. In JavaScript, we use its equivalent.
Create a file named jsconfig.json in your project root:
{
  "compilerOptions": {
    "baseUrl": ".",
    "paths": {
      "@/*": ["./src/*"]
    }
  }
}
This simple file maps the @/ alias to your /src folder, resolving import errors instantly.
Step 3: Run the CLI and Opt-Out of TS
Run the official initializer. Crucially, when prompted for TypeScript, select "No."
npx shadcn-ui@latest initDuring the setup process, the CLI updates your configuration file (components.json) to specifically disable TypeScript ("tsx": false). This is the magic switch that tells the CLI to generate .jsx instead of .tsx.
Step 4: Add Your First Component
Now, fetch components normally. The CLI respects the JS setting from your initialization.
npx shadcn-ui@latest add buttonThis command will place a file called button.jsx inside your /components/ui directory, ready to use.
Step 5: Ship It
You can now import and use the component in any .jsx file.
// src/App.jsx
import { Button } from '@/components/ui/button';

export function App() {
  return (
    <Button onClick={() => console.log('Stowed it!')}>
      Click and Ship
    </Button>
  );
}
4. Trade-Offs: When to Switch to TypeScript
The JavaScript integration works flawlessly, but there is one key trade-off you accept: Developer Experience (DX).
By stripping the types, you lose:
- Compile-Time Error Catching: TypeScript flags errors before the code runs. In JS mode, you’ll catch them at runtime.
- Intellisense/Autocompletion: You lose the rich, context-aware suggestions provided by TS types when passing props to a component.
If your project grows in complexity, or if you're working with a large team, switching to TypeScript offers better long-term reliability. But for speed, simplicity, and smaller stacks, pure JavaScript is a perfectly valid choice.